


If you want to create Asana task with form submission in WordPress, you’re in the right place. Managing tasks manually can be time-consuming, but automating this process makes project management easier. There are two simple ways to achieve this—first, by using Asana’s built-in forms, and second, by integrating your WordPress form with Asana through tools like Zapier.
In today’s post, we will walk through both methods step-by-step so you can decide which works best for your workflow.
Table of Contents
How to Create Asana Task With Form Submission in WordPress
Method 1: Create a Task Using Asana’s Built-in Forms
Step 1: Log in to Asana
Go to Asana and log in with your account.
Step 2: Create a Project
Click on “+ New Project” and give it a name. This will be the project where your form submissions will create tasks.
Step 3: Customize the Project
Inside your particular project, click on “Customize” in the top right corner. Here you’ll find the Forms option.

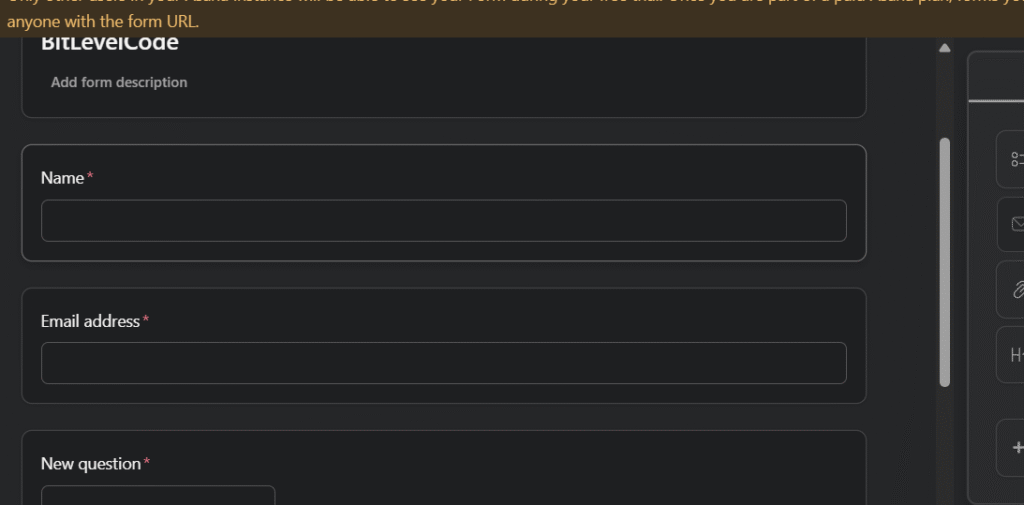
Step 4: Create a Form
- Click Add Form.
- Add different fields like text, email, number, date, or dropdown.
- To add a new question, drag options from the right-hand panel.
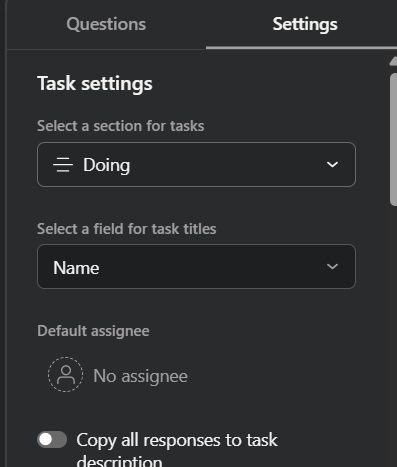
Step 5: Set Task Destination
In the Form Settings, choose where new submissions will create tasks inside your project.
Step 6: Share the Form
- You’ll get a shareable URL or embed code.
- If you choose embed code, you can paste it into your WordPress page or post and even style it.
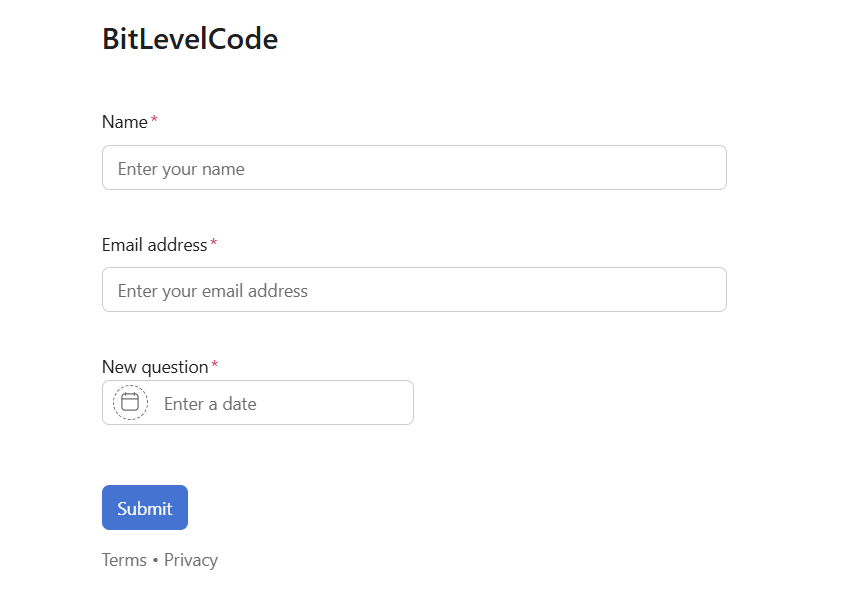
Step 7: Publish and Test
- Save and publish your form.
- Submit a test entry and check if it creates a task in your Asana project.
Important Note About Assignments
By default, Asana Forms do not allow you to assign a task to a specific person automatically.
If you want to assign a task to someone based on form submission, you’ll need to use an integration tool like Zapier or Make.com.
Important Note About Assignments in Asana Forms
By default, Asana Forms do not let you assign tasks to different people automatically.
You have two options here:
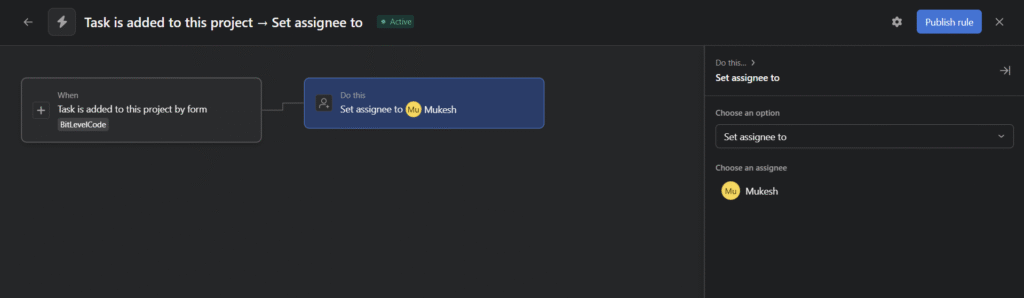
- Manual Rule Assignment:
- Go to your project → Customize → Rules.
- Add a rule: When task is added → Assign to [specific member].
- But note: this always assigns tasks to the same person.
- Dynamic Assignment:
- If you want to assign different members automatically based on form input, you’ll need Zapier or Make.com.
Method 2: Create a Task and Assign Automatically Using Zapier
This method gives you more flexibility because you can assign tasks directly during creation. For this, you’ll need the Contact Form 7 Webhook plugin.
Step 1: Install Plugins in WordPress
- Install and activate Contact Form 7.
- Install and activate the Contact Form 7 Webhook plugin.
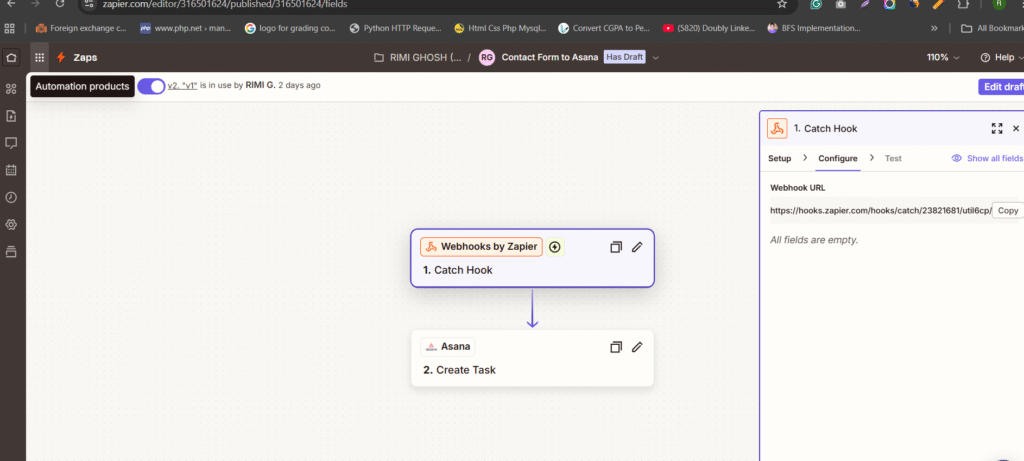
Step 2: Create a Zap in Zapier
- Go to Zapier → Click Create Zap.
- Choose Webhooks by Zapier → Select Catch Hook.
- Copy the webhook URL.
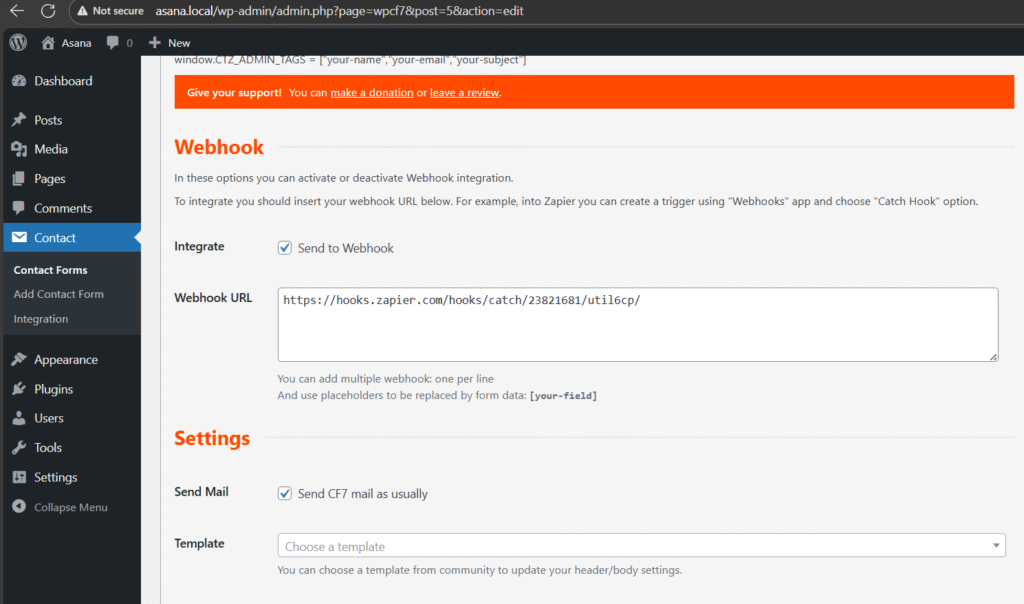
Step 3: Connect Webhook to CF7
- Edit your Contact Form 7 form in WordPress.
- Open the Webhook tab and paste the Zapier webhook URL.
- Save the form.
Step 4: Test the Connection
- Publish the form first.
- Submit a test entry.
- In Zapier, click Test Trigger and confirm data is coming through.
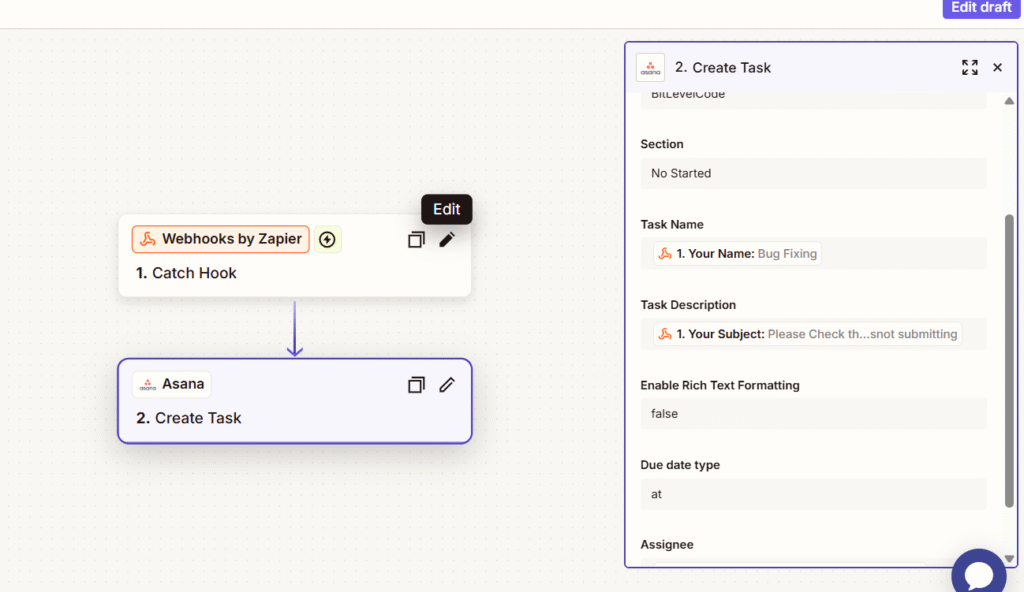
Step 5: Create a Task in Asana
- In Zapier, add Asana as the action app.
- Select Create Task.
- Map your CF7 fields (e.g., name → task title, email → description, message → notes).
- In the Assignee field, choose who the task should be assigned to.
Step 6: Test and Publish
- Run a test in Zapier.
- Check your Asana project to see if the task is created and assigned correctly.
- If all looks good, click Publish Zap.
- Now tasks will be automatically created and assigned every time your form is submitted.
Final Thoughts: Create Asana Task with Form Submission in WordPress
- Use Asana Forms if you want simple task creation and can work with fixed assignees.
- Use Zapier with Contact Form 7 for more control, including automatic assignment, dynamic fields, and flexible workflows.
Note: The person you assign must already be a member of your Asana workspace/project. If they are not in Asana, the assignment will fail.
Recent Post:
>> How to Load More Images on Scroll Using AJAX in WordPress
Conclusion
Connecting form submissions with Asana task assignment is one of the best ways to keep your team’s workflow smooth and transparent. You can use Asana’s own rules for direct assignment or take the flexible route with Zapier, which allows you to link any form tool (like Google Forms, Typeform, or WordPress forms) to Asana.
Whichever method you choose, always remember: the person you assign must already be part of your Asana workspace/project; otherwise, the task assignment will fail. By setting this up properly, every form response automatically turns into an actionable task in Asana—ensuring the right person is notified, deadlines are clear, and no request gets missed.